Showing posts with label brown sugar. Show all posts

Saturday, 9 November 2013

apple pie with cheddar cheese crust

I love apple pie. Short, rich pastry encasing sweet, soft apples flavoured with cinnamon - what's not to love? I've been hearing a lot about cheese incorporated into the pastry crust of an apple pie quite a lot recently, and whilst it sounds a little weird at first there was something about the combination that seemed to make sense. You can experiment with any kind of cheese but I decided on that for my first attempt I would try a medium mature cheddar.  This pie is delicious with a drizzle of cream, custard or a good dollop of ice cream.


Ingredients
For the pastry:
225g plain (all purpose) flour
100g softened butter
75g grated cheddar
3-4 tbsp ice cold water

For the filling:
5-6 eating apples (such as golden delicious, granny smith, jazz) peeled, cored and finely sliced
6 tbsp soft brown sugar (adjust this to your own taste)
1/2 tbsp ground cinnamon
1 tbsp cornflour, regular flour or semolina
  1. Start by making the pastry. Combine the butter and flour in a large bowl and rub between your finger tips until everything is combined and is the texture of coarse breadcrumbs. Alternatively you can pulse the two together in a food processor until you have achieved the same consistency.
  2. Add all the cheese and a couple of tablespoons of the water and bring together the breadcrumbs until a rough dough ball is formed. You may need to add some extra water or not as much. Be guided by the consistency you achieve, just remember you want to handle and work the pastry as little as possible to make sure it retains its short, crumbly texture when cooked. Cover the pastry in cling film and leave to rest in the fridge for at least 30 minutes. 
  3. Once the pastry has rested, pre-heat your oven to 220C. Next put the sliced apples, sugar and cinnamon in a large bowl and mix together until the apple is thoroughly coated in everything.
  4. Cut off a third of the pastry and set aside for the lid. With the remaining two thirds roll it out thinly so that it is large enough to line the base of your pie dish. Alternatively you can coarsely grate the pastry into the pie dish and push together the pieces to form the base. 
  5. Sprinkle the cornflour over the base (this will help to avoid a soggy bottom on your pie) then spread the apple mixture over the top. 
  6. Roll out the pastry for you lid then carefully place it over the filling. Crimp together the edges and cut a hole in the top to allow steam from the filling to escape. You can use beaten egg on the rim of the pastry to help it join together if you like but I didn't find it was needed. 
  7. Brush the top with beaten egg or milk if you want a golden, shiny top then place the pie in the oven. Cook at 220C for 10 minutes then reduce the temperature to 190C and continue to cook for a further 45 minutes or until the pie is golden brown and cooked through. Remove from the oven when it's done and leave it to cool for 20 minutes or so before eating.


Saturday, 15 December 2012

chocolate malt cookies

It's been a long time since I made cookies, mostly because I don't have any will power and would eat the whole batch within a day. But it's my birthday coming up and I figure I'm allowed a treat every now and again. These cookies absolutely rock and I will definitely be making them again soon. The chocolate flavour here is not overwhelming and the little nuggets of malteasers/whoppers bring a great extra layer of loveliness. I know you will love this recipe if you give it a go.


Ingredients (based on a recipe from hummingbird on high.)
1 cup plain flour
1/2 teaspoon baking powder
1/2 teaspoon salt
1/2 cup Ovaltine or other malted milk powder with some cocoa
115g unsalted butter, softened
1/2 cup light brown sugar
1/4 cup granulated sugar
1 large egg, at room temperature
1/2 teaspoon vanilla extract
1 ½ cup malteasers/whoppers, very roughly chopped (I used a 135g sharing pouch of malteasers)


  1. Preheat the oven to 190C and line a couple of baking sheets with parchment paper. 
  2. Cream together the butter and sugars for a few minutes, until the colour has lightened and like a milky coffee. (about 3 minutes with an electric whisk should do it).
  3. Add the egg and vanilla extract and beat for 30 seconds or so more so that everything is combined. 
  4. Now add the flour, ovaltine, salt and baking powder. Beat everything together well for a few seconds. There's no need to beat it for very long.
  5. Stir through your roughly chopped malteasers or whoppers with a spoon or spatula. then dollop tablespoons of the mixture on to the baking sheets. Make sure you leave plenty of space between each cookie as these spread out a lot. 
  6. Bake for 8 minutes if you want them soft and gooey and more brownie like or for 10 minutes if you want them to have more crunch. I tried both ways and they're equally awesome.
  7. Remove from the oven and allow the cookies to cool on the tray before moving them. They will be very soft and hot so give them at least 15 minutes or half an hour before you try to move them.


Sunday, 25 November 2012

prize winning swedish cardamon bread - two ways


MY VERSION These quantities will give you enough dough for two loaves. For variety I normally make one filled loaf and one plain loaf.

Dough:
400ml milk
110g butter
30g of fresh yeast of 2 x 7g sachets of dried yeast
110g caster sugar
750g plain flour
1/2 teaspoon salt
2 tsp ground cardamom (it’s best if you split then remove the black seeds inside green cardamom pods and grind them in a pestle and mortar)
1 egg, beaten

Filling: (Enough for one loaf)
100g soft butter
60g soft brown sugar
25g granulated or caster sugar
2 tsps ground cinnamon
1 tsp ground cardamon

Optional extras: handful of nuts and/or raisins

1. In a large saucepan, gently heat the milk , butter and ground cardamom until just warm and all the butter has melted.
2. Remove from the heat and once it has cooled to luke warm add the egg and fresh or dried yeast and whisk thoroughly. (If you are using fast action yeast just heat the milk, butter and cardamom and add the yeast with the flour and other dry ingredients).
3. Place the flour, salt, sugar (and fast action yeast if using) into a large bowl and make a well in the centre. Pour in them milk, egg and butter mixture and combine everything together by hand or using a wooden spoon so that you get a rough dough.
4. At this stage you need to turn the dough out on to a floured surface and give it a good knead until it is smooth and silky. Place the dough in a floured bowl, cover with plastic wrap and a tea towel and place in a warm place to double in size (about and hour). Go and enjoy a cup of tea, listen to the radio or read a good book.
5. Once the dough has risen, knock it back, remove from the bowl and divide the dough in two. Then follow either the instructions for a plain loaf or the pull apart version.


Pull-apart Cardamon Bread
1. Grease and flour a tin.
2. Take half the dough and place on to a lightly floured surface. Use a rolling pin to roll out the dough into a rectangle shape of about 0.5cm thickness.
3. Mix together the butter, sugar and spices then spread over the dough, sprinkle over the raisins and nuts if using. Make sure that there is an even covering.
4. Now cut the rectangle in half lengthways and roll up each smaller rectangle into tight log shape with the filling on the inside.
5. Cut into slices about 2-3cm thick and place the pieces into the prepared tin with the cut, see the picture below for how I did it.
6. Cover over again then leave in a warm place for the final rise of about an hour.
7. Preheat the oven to 180C then bake in the oven for around 30 minutes. You will know the bread is finished when the top is very golden brown.
8. Allow to cool in the pan for 20 minutes or so then loosen the bread with a knife and turn out on to a plate or board. Turn it right way up again using another plate to help.


PLAIN
1. Preheat the oven to 180C
2. Split the dough into three equal pieces and make each piece into a rope.
3. Plait/braid the ropes together and tuck the edges under.
4. Place on a lined baking sheet, brush generously with egg wash and sprinkle with slivered almonds or sugar crystals. Bake in the oven for around 30 minutes.
5. Once the loaf has cooled you can either serve it as it is or decorate with a simple glaze of icing sugar mixed with a couple of drops of water and a scattering of slivered almonds.


Sunday, 14 October 2012

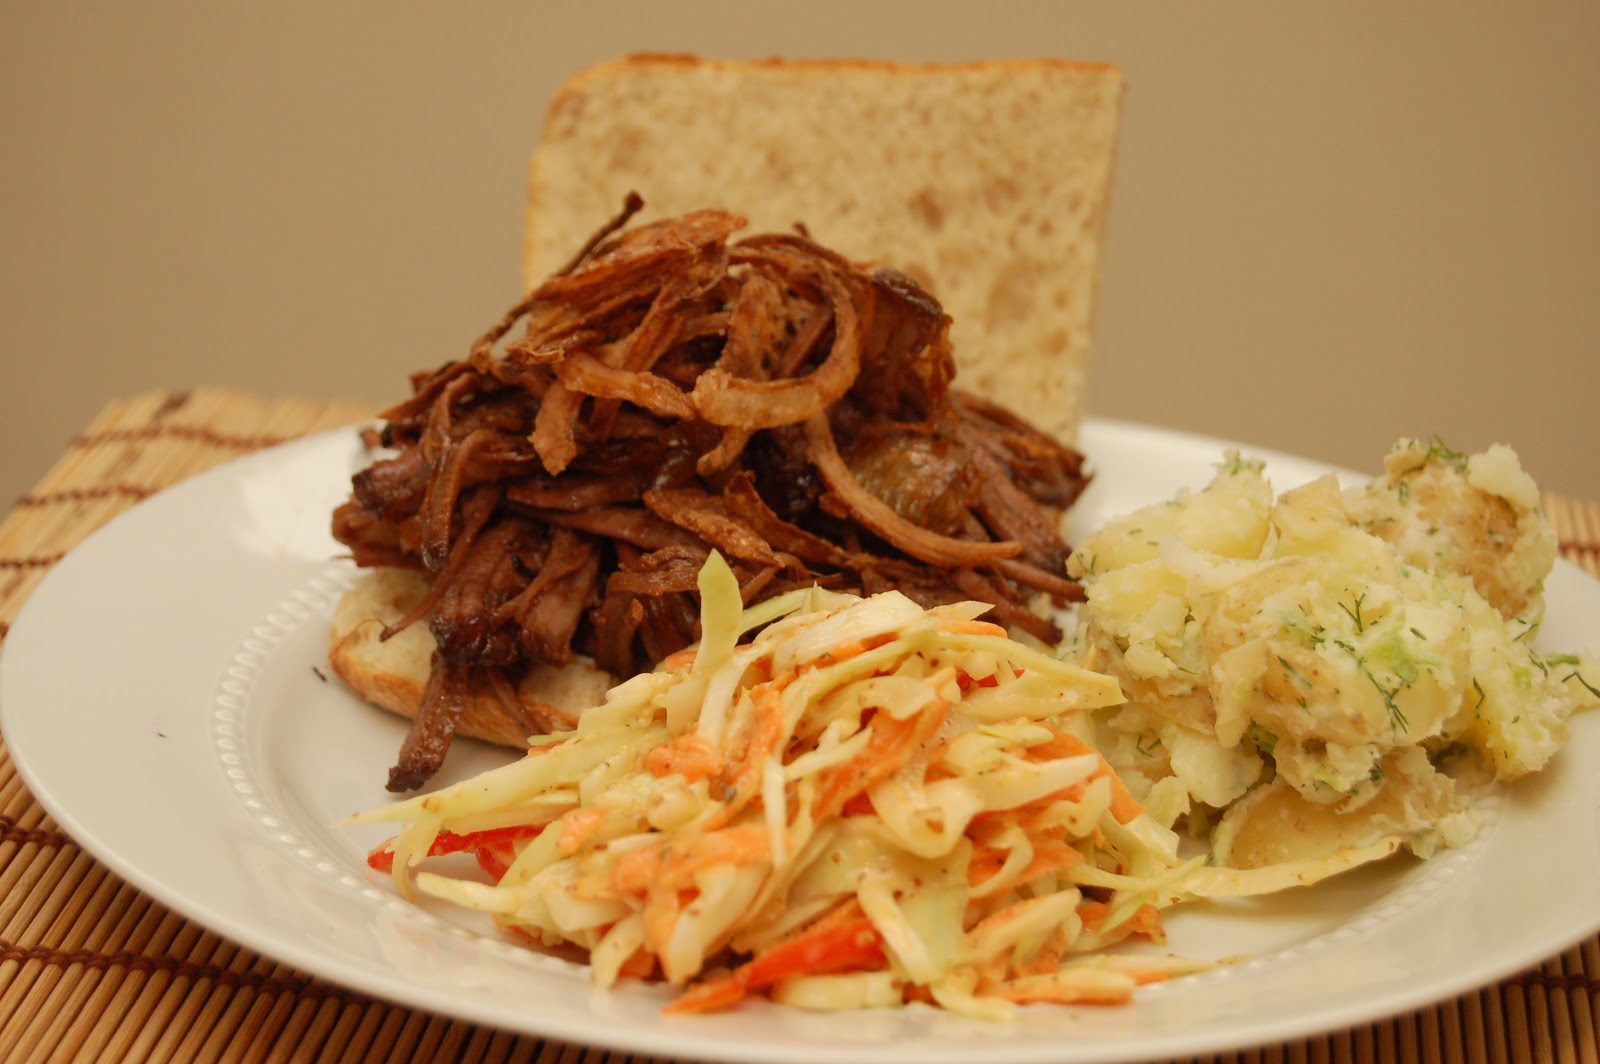
shredded beef brisket with crispy onions

This weekend I was in the mood for some slow cooking. When you've got the time it's great to do this, the flavour is amazing and it's a fantastic way to make the most of an inexpensive cut of meat. This method would probably work equally well with a pork shoulder or leg joint or even some lamb. I haven't tried it yet myself though.


Ingredients
800g beef brisket
2 tbsp worcestershire sauce
2 tbsp brown sugar
1 tbsp cider vinegar
1 tsp fennel seeds
1 tbsp smoked paprika
3 whole cloves garlic
2 whole star anise
2-3 bay leaves
5 Juniper berries
salt and pepper
2 onions, peeled and roughly chopped
1 small bottle of beer (I used Gulden Draak)

  1. Heat the oven to 160C.
  2. Put the onions in the bottom of a casserole dish or roasting pan. Generously season the brisket on both sides with the salt and pepper then place on top of the onions. 
  3. Sprinkle over the fennel seeds, juniper berries, smoked paprika and sugar. Add the rest of the ingredients to the pan. The liquid should come about half way up the meat.
  4. Cover with a lid or foil then cook slowly in the oven for around 3-4 hours. You will know the meat is done when it falls apart easily. During the cooking process I usually turn the meat over in the cooking juices a few times.
  5. Once the meat has cooked, remove it from the oven and place the meat on a board, cover and leave to rest. Remove the whole spices from the cooking juices.
  6. Either finely slice the brisket or shred with a fork, add to the cooking juices and thoroughly combine.
  7. You can eat this with many accompaniments but we went for a ciabatta bread roll with some crispy fried onions and sides of potato salad and honey mustard coleslaw.


Crispy Fried Onions
1 medium onion, peeled and finely sliced
2 tbps cornflour or plain flour
salt and pepper
vegetable oil for frying
  1. In a saucepan or deep frying pan add enough oil to deep fry the onion, around 1/4 cup should do it, but this depends on the size of your pan. Heat over a medium heat.
  2. Place the flour in a shallow dish and generously season with salt and pepper. Add in the sliced onion and ensure it is thoroughly coated in the seasoned flour.
  3. Check that the oil has reached the required temperature by dropping in a piece of the onion, if it gently sizzles the oil is ready.
  4. Add in the rest of the onion, being careful not to over crowd the pan - you may need to do this in batches. Cook the onion until it has turned golden brown and crispy. 
  5. Remove from the oil with a slotted spoon and drain on kitchen paper. 
  6. Repeat this process until all the onion has been cooked.


follow me

Follow Us