Showing posts with label chili. Show all posts

Sunday, 11 November 2012

prawn and sweet potato curry


This is a delicious and easy curry recipe that is broadly inspired by a Malaysian style prawn curry. You can adjust the number of chillies to your preferred heat. While the six I put in this one may seem like a lot, the tomatoes, coconut milk and sweet potatoes temper them a little. This made a wonderful Sunday supper.

Ingredients
Curry Paste:
4 green finger chillies
2 dried red chillies
4 shallots peeled and roughly chopped
4 garlic cloves
2 lemongrass stalks chopped into smaller pieces
1 tsp ground turmeric
1 tbsp fish sauce, shrimp paste or salt
3 cm chunk of root ginger, peeled

Everything else:
3 tbsp vegetable oil
2-3 sweet potatoes, peeled and cut into bite sized chunks
400ml coconut milk
400g tinned tomatoes
300ml water
10 curry leaves (fresh is best if you can get hold of them)
2-4 green chillies (optional if you want extra heat)
500g raw prawns
1/2 tsp tamarind paste
1/2 tsp black mustard seeds

To serve:
1 tbsp vegetable oil
10 curry leaves
1/2 tsp black mustard seeds
lime wedges
fresh mint and coriander 
steamed basmati or jasmine rice 
  1. Place all the paste ingredients in a food processor and process until you have a smooth paste. Set to one side until you are ready to use it.
  2. In a large, heavy based saucepan heat the oil over a medium high heat. Add the curry leaves and mustard seeds and cook until their scent is released and the seeds begin to pop. Next add the curry paste and continue to cook until it begins to dry and becomes fragrant. Stir frequently to avoid the paste sticking to the pan.
  3. Add the tinned tomatoes and tamarind paste and cook for a further 3-4 minutes. 
  4. Next add the water and sweet potato chunks, reduce the heat and simmer for around 15 minutes or until they are tender and the sauce has reduced.
  5. Add the prawns and cook for another 5 minutes or until they are cooked through. Finally add the coconut milk and simmer for a couple of minutes. 
  6. For a final flourish, in a small frying pan heat the extra tbsp of oil until hot, add the curry leaves and mustard seed and fry for 20-30 seconds until fragrant then pour over the curry.
  7. Serve with steamed rice and garnish with lime wedges and chopped fresh mint and coriander.


I've entered this recipe into A Kick at the Pantry Door's 'Feel Good Food Challenge'. Why not take a look at all the other great recipes featured. 


Saturday, 20 October 2012

(award winning) linguine with breadcrumbs, chili, garlic and anchovy


I love this recipe and there are so many possible variations. I almost always have the ingredients for this in the house so it's a great meal when you haven't got much in or pushed for time. Even if you think you don't like anchovies I urge you to try this recipe. They disappear into the sauce to give a rich and salty flavour to the whole dish. But if you really can't bring yourself to use them leave them out but add some extra olive oil to help the sauce along or try a sundried tomato paste instead. (I've put the complete instructions for this recipe at the end of the post.) This recipe is so good that it one the judges prize in the Instructables Pasta Contest.


Ingredients

250g linguine or spaghetti
70g fresh bread crumbs
1/2 - 1 tsp chili flakes
4 cloves of garlic finely chopped
handful of flat leaf parsley
50g tin anchovy fillets in olive oil
1/2 tsp fennel seeds
1 tbsp olive oil
freshly ground black pepper


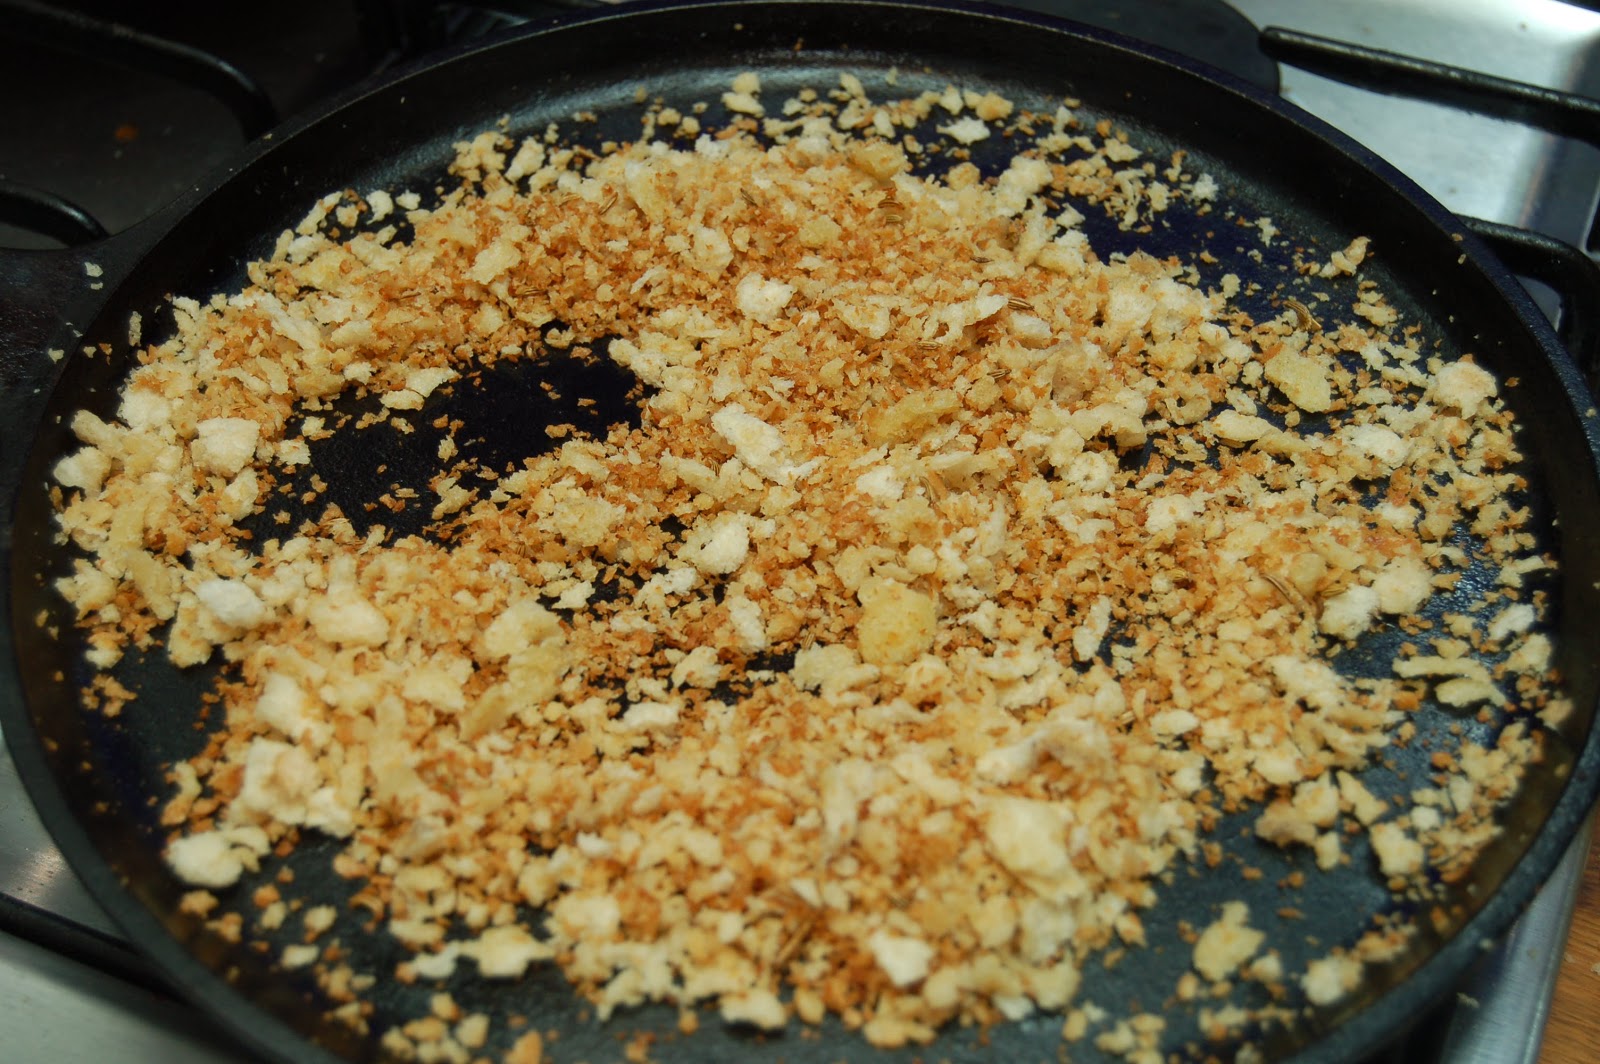
Heat a cast iron skillet or thick based frying pan and toast the bread crumbs in the olive oil until golden brown. Just before you remove from the heat add in the fennel seeds and lightly toast. Put the crumbs into a dish and set to one side.


Cook the linguine according to the pack instructions in well salted water.


About 5 minutes before the pasta is cooked heat a wide frying pan over a medium high heat.
Carefully pour in the oil from the anchovy tin and cook the garlic and chili flakes until golden. 


Next add the anchovy fillets and using a wooden spoon squish them until they have dissolved into the garlic and chili mix. Add a couple of ladles of the pasta cooking water to help this along so that you end up with a creamy puree.


Once the pasta is cooked add it to the anchovy mixture followed by the black pepper and the parsley.


Finally add the bread crumbs and stir through then serve.


Complete Instructions
  1. Heat a cast iron skillet or thick based frying pan and toast the bread crumbs in the olive oil until golden brown. Just before you remove from the heat add in the fennel seeds and lightly toast. Put the crumbs into a dish and set to one side. 
  2. Cook the linguine according to the pack instructions in well salted water. 
  3. About 5 minutes before the pasta is cooked heat a wide frying pan over a medium high heat.
  4. Carefully pour in the oil from the anchovy tin and cook the garlic and chili flakes until golden. 
  5. Next add the anchovy fillets and using a wooden spoon squish them until they have dissolved into the garlic and chili mix. Add a couple of ladles of the pasta cooking water to help this along so that you end up with a creamy puree. 
  6. Once the pasta is cooked add it to the anchovy mixture followed by the black pepper and the parsley. Finally add the bread crumbs and stir through then serve. 


Monday, 8 October 2012

spicy tomato coconut soup


This was my warming supper tonight. The weather has turned a lot colder the last few weeks and I've started craving the comforting warmth of bowls of home made soup with thick slices of bread and butter. I made this soup with ingredients I had in my cupboard as I haven't had chance to get to the shops for a few days. For a store cupboard recipe, I have to say, this is pretty classy and well worth making.

Ingredients
2 x 400g tins of tomatoes
2 tbsp vegetable oil
1 medium onion, finely diced
2 tsp red chili flakes (adjust according to how spicy you want it)
2 tsp panch phoran (a Bengali 5 spice mix, available in larger supermarkets)
3 cm chunk of fresh ginger, peeled and grated
2 cloves of garlic, grated or crushed
2 tsp garam masala
400ml can of half fat coconut milk
  1. Place a large saucepan over a medium high heat, add the oil and heat for a few seconds.
  2. Add the onion to the pan and cook until translucent and soft.
  3. Add the  chilli flakes and allow the spices to sizzle for around 30 seconds, next add the panch phoran, ginger and garlic and cook out for a minute or so. 
  4. Next add the tinned tomatoes and simmer the mixture over a medium heat for 10-15 minutes.
  5. Stir through the garam masala and continue to cook for another 5-10 minutes until the tomatoes have thickened and taken on a rich, more orange colour.
  6. Add a generous pinch of salt and a teaspoon of sugar then either using a stick blender or food processor blitz the soup for until you have removed the lumps. This stage is optional but I prefer a smooth tomato soup.
  7. Return the blended tomatoes to the saucepan, add the coconut milk, stir thoroughly and heat through for a few minutes.
  8. Serve with either rice or a thick chunk of bread. I ate mine with my homemade, savour pumpkin bread.


Sunday, 7 October 2012

slow cooked pork with ras al hanout, rosemary and salt cured orange


This is the first of, hopefully, an ongoing series of recipes from my sister. I'll ask her to introduce herself in a future post but in the mean time enjoy this delicious slow cooked pork recipe with a side of split peas.

Ingredients
2kg pork shoulder 
1 large onion
2 or 3 sticks celery
1 large carrot
1 salt cured orange pith removed (preserved lemons can be substituted)
3 large garlic cloves 

Spice rub:
2 tbsp ras al hanout mix
3/4 cloves
2 tbsp sugar
1 tbsp salt
1 tbsp black pepper
2 rosemary sprigs
  1. Mix spice rub ingredients and rub over pork joint. Leave to marinade for at least a few hours - I leave overnight. 
  2. Add roughly chopped veg, orange and pork to the slow cooker with water to reach half way up the joint. 
  3. Cook on low-medium for 6-12 hours. It's done when it is tender and pulls apart easily. 
  4. Served shredded or in large chunks with accompaniment of choice 
  5. Good served with flat bread/wraps/rice/potatoes - I am happy with most carbs as a accompaniment to this recipe! 


 Split peas with mint, lemon and chilli
2 cups split peas
1 chilli
1 onion
2 garlic cloves
2 lemons (zest and juice)
Olive oil
Handful Fresh mint
Salt/pepper
Pinch of Paprika/ras al hanout 


  1. Soak split peas overnight
  2. Rinse well then place in large pan with lots of water 
  3. Add 1/2 the mint, 1 chopped onion, 1 lemon zest, chilli, 
  4. Boil for 10-15 mins uncovered then simmer covered until tender (approx 40 mins-1 hour) Can also be cooked in slow cooker. I did this for about 6 hours on med-high setting but they're done when soft.
  5. Drain when done and add remaining mint (leaving a small amount back for garnish) lemon juice and zest, garlic, salt, pepper, olive oil 
  6. You can leave chunky but I blend it then add pinch of paprika or ras al hanout and some mint to serve. 
  7. Good warm as an accompaniment or cold as a dip or on toasted bread.

Sunday, 9 September 2012

garbanzos con carne molina / chickpeas and mince - my style


This recipe is not a classy dish but it is a hearty dinner with an excellent balance of spicy and savoury and a comforting texture. I have a feeling that this dish will be a feature of my autumn and winter dining for some time to come. It is part inspired by the garbanzos con carne molida from this intriguing Colombian recipe blog and also the Spanish dish of arroz con garbanzos.

I used Laverstoke Park, lean buffalo mince in this dish as I enjoy the flavour and the fact that it is only 3% fat but you could use any minced beef, veal or pork. Feel free to experiment.

The amounts below are enough for 2-4 people depending on how greedy you are.

Ingredients
300g lean buffalo mince
1 medium onion, finely chopped
2 cloves of garlic grated/minced/crushed
1 tsp chilli flakes, add more if you like it spicy
1 tsp dried tarragon
1 tsp ground cumin
2 tsp hot smoked paprika
1 tbsp olive oil
1 tbsp tomato puree
400g can chickpeas, drained
generous handful of chopped, fresh coriander
salt and pepper
wedge of lime to squeeze over at the end
100g basmati or other long grain rice cooked with 1 good quality beef stock cube (e.g. Kallo) - see below for my method.


  1. Heat a wide frying or saute pan over a medium heat then add the oil and cook the onion until translucent, you don't want it to colour too much.
  2. Add the chili flakes and cumin and stir together, cook for a further minute or two.
  3. Now add the mince and stir until it has all browned evenly. 
  4. Next add the crushed garlic and stir, followed by the tomato puree. TIP: Before you stir the tomato puree through the whole mixture cook it for about a minute to one side of the pan until you start to see the colour change. This will help to intensify the flavour. 
  5. At this stage I had a left over grilled aubergine so chopped it up and added it in for an additional texture and flavour but this recipe will work equally well without or you could experiment by adding other roasted veg such as red peppers or courgettes.
  6. Next add the smoked paprika followed by the drained chickpeas. Lower the heat then cook the mixture for a further 5-10 minutes.
  7. Taste for seasoning then adjust to your preferences.
  8. Mix the rice into the meat and chickpea mixture and continue to cook over a low heat until it is all heated through.
  9. Sprinkle over the fresh coriander then serve with lime wedges on the side.


How to cook perfect rice...
  1. Put the rice in a saucepan, cover with boiling water/stock so that the water is about 1.5cm above the rice.
  2. Cover, then boil on a medium heat for 5mins then turn the heat off and leave for approx 10 mins until all the water is absorbed. Do not lift the lid at this stage. Trust that this will all work out. 
  3. While the rice is cooking you can get on with the rest of the meal.
  4. When the rice is ready to use you should have perfectly separate, fluffy grains of rice.


Sunday, 19 August 2012

spicy dr pepper shredded pork

I discovered this recipe from the pioneer woman while searching the web for inspiration the other day and just had to try it. It looked and sounded like a great combination of flavours and very easy to do so here goes.


NOTE: If you can't get hold of the canned chipotle peppers in sauce, you could try using a tin of tomatoes, a good couple of tablespoons of spicy smoked paprika and some added fresh chillies (whole) or some chilli powder.

Ingredients
c. 2kg Pork Shoulder Joint. This is what I used.
2 cans of Dr Pepper
2 x 212g/7.5oz cans of Chipotle chilies in adobo. (I bought mine through amazon.)
1 large onion cut into quarters
salt and pepper
  1. Preheat your oven to 150 C. 
  2. Put the quartered onions in to the bottom of your pan and then put the pork shoulder joint on top. 
  3. Next pour in the canned chipotle peppers and the Dr Pepper. Season with salt and pepper if you wish, put the lid on your dish then put in the oven. The aim here is to cook the pork long and slow so the meat eventually just falls apart. It will take around 6 hours for this happen. Turn the meat over every hour or so that all the meat gets chance to cook in the spicy, Dr Pepper sauce. 
  4. Once the pork is cooked remove the meat from the pan and put on a plate and cover until needed.
  5. A lot of fat will have been released form the pork shoulder, so unless you want this in your sauce I recommend you strain this off. It is easier to do this if you allow it to sit over night in the fridge and the fat will solidify at the top.
  6. Once you have dealt with the fat (you may also wish to make the sauce smoother by blending it or passing it through a sieve), return the sauce to a saucepan and reduce down a little over a gentle heat. While this is happening use two forks pull the pork into shreds and then put in the sauce.
  7. Once your sauce is at your desired consistency, I like mine quite thick, the pork is ready to serve. It will work brilliantly with jacket potatoes, in a sandwich with good crusty bread or as we had it, in corn tortilla with a little cheese and a crunchy salsa.


Friday, 17 August 2012

tasty easy lamb kebabs


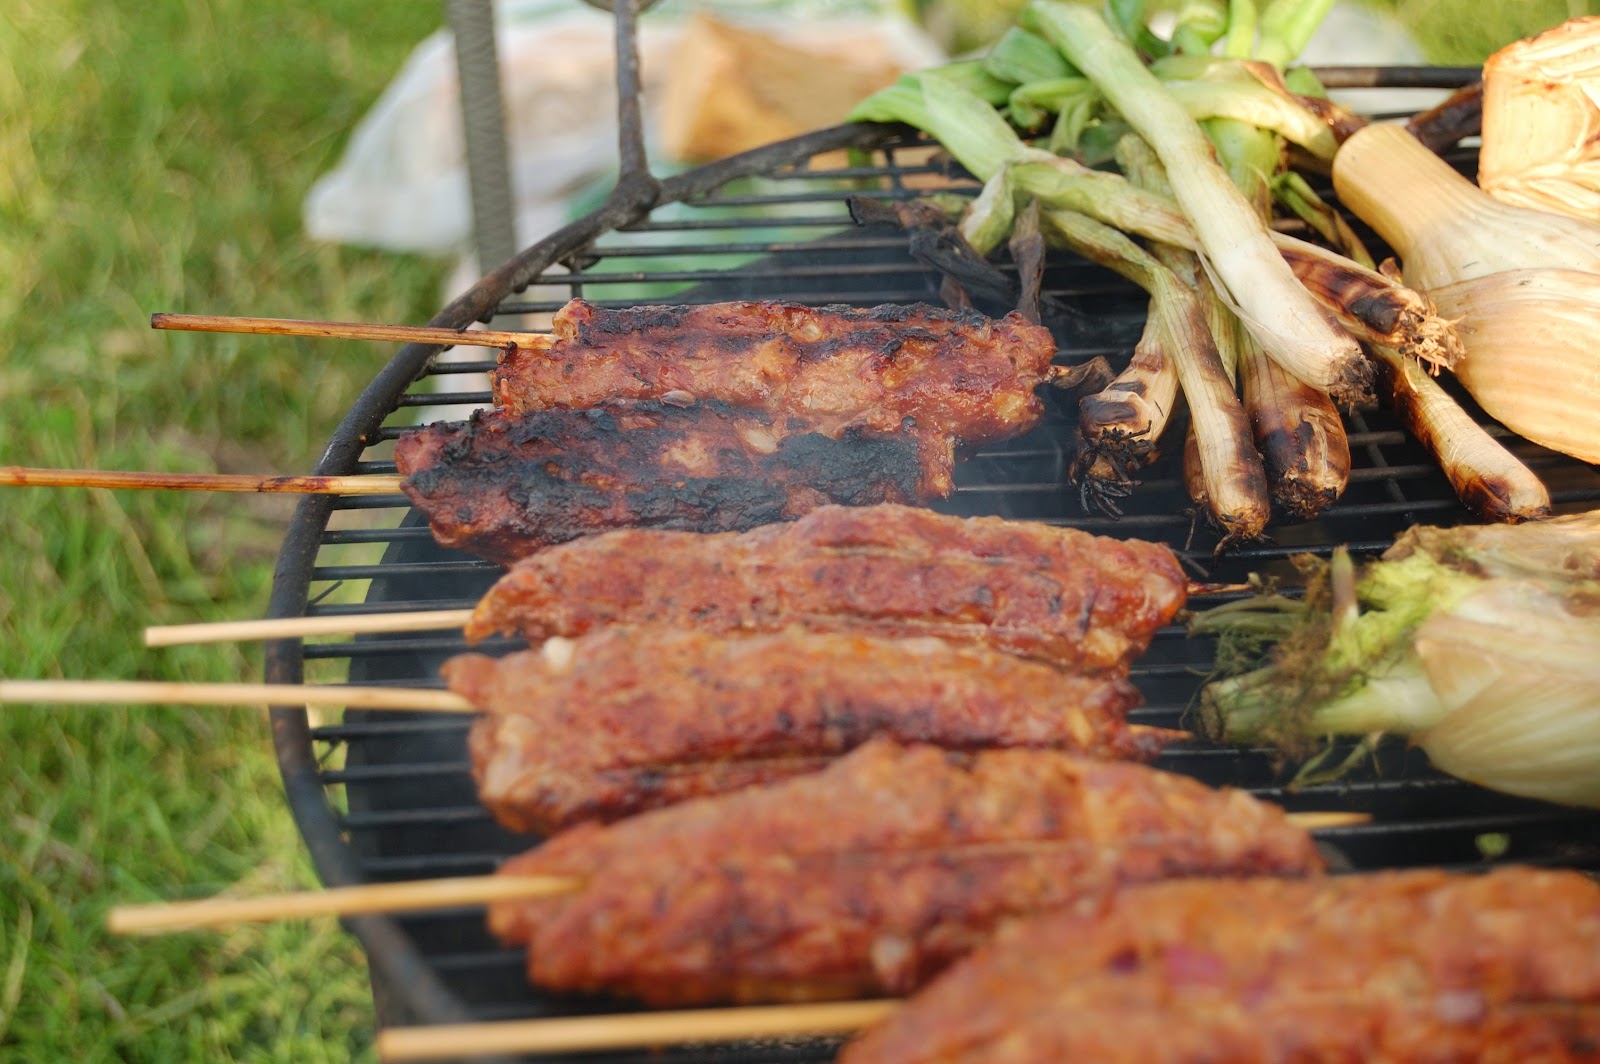
We've recently come back from a weekend camping trip and were lucky enough to have glorious weather the whole time. As the campsite provided fire pits with cooking grills I decided to make the most of it and cook up an outdoor feast of lamb kebabs and grilled veggies. I can't help thinking that I was inspired to cook lamb because I was in a field of sheep!

You can't beat the flavour you get in these kebabs if you are able to barbecue them but they can also be cooked at home in a ridged griddle pan. To make them in to a meal add your favourite combination of flat bread, grilled veg, aubergine puree, hummus, yogurt dressing and chili sauce (this one is my current favourite). YUM

Ingredients
400g lean lamb mince (you can use the full fat version but this still has more than enough fat in it)
2-4 tsp harissa paste
1 tsp dried mint (it really is much better than fresh in this recipe)
red chilli flakes (optional)
small onion, finely chopped or grated
salt & pepper

Skewers (if you are using wooden ones make sure they are soaked in water for at least 30 mins)

Makes 6-8 kebabs depending on size.
  1. Preheat your griddle pan if cooking indoors or make sure you barbecue/fire is glowing hot and ready to cook on.
  2. Mix all the ingredients together in a bowl, hands work best but use a spoon if you must.
  3. Divide the mix into 6-8 portions in the bowl then take each portion and form into long sausage shapes around the skewers. You don't have to use the skewers but it does make it easier to turn the kebabs. If you don't use skewers feel free to shape the lamb however you wish.
  4. Place the kebabs on the very hot grill/griddle pan and don't move them around or turn them until they are nicely browned and come away easily from the grill. Once they can be moved, rotate them so that they are cooked evenly. you want them to be nice a golden brown all round - not burnt.


Thursday, 16 August 2012

iberian feast


Having recently returned from a trip to glorious Porto I have now developed a serious taste for the drink that gives the town its name. The city is visually stunning and lots of fun to explore with some lovely bars, restaurants and cafes and a great atmosphere. One of the most memorable parts of the trip was learning about port and you really can't go there and not sample the drink. In one particular bar you can enjoy a huge variety of ports from a range of bodegas. They also offer a tasting selection accompanied by chocolate and fruit. We enjoyed the atmosphere of this bar so much that we returned on subsequent nights.

Since returning home we have now set ourselves the task of finding our favourite tawny port. We've got three bottles lined up and will be accompanying the tasting with some of our favourite Iberian foods.


Gambas al Pil Pil
Ingredients
Approx 300g raw prawns
3 tbsp extra virgin olive oil
3-5 cloves garlic (add more if you want it extra stinky), finely sliced
at least 1 tsp dried red chilli flakes but feel free to add more to taste.
Salt and pepper to taste
  1. Heat up your pan, add the oil followed by the garlic and chili flakes. 
  2. Once the garlic is golden brown, take care not to let it burn, add your prawns and cook until they have turn pink all over and are completely cooked. This will take a couple of minutes. 
  3. Season with salt and pepper.
  4. Put the whole lot into a serving dish, oil and all, and you're ready to eat. It isn't particularly low calorie but it is really tasty to dip your bread in the garlicky, chili, prawn oil. Yum.


Padron Peppers (Pimientos de Padron)
Whilst this is a Spanish recipe, Padron peppers come from the town of Padron in Galicia, which is the bit of Spain that overhangs Portugal in the north. This is a ridiculously easy recipe but it is important you get the correct peppers and don't scrimp with the salt. In season, Padron Peppers are starting to appear in supermarkets. I've also noticed an Italian equivalent called Friggitelli in some supermarkets. They are not the same kind of pepper but could serve the same purpose in a tapas selection.

Ingredients
Packet of Padron Peppers - 130g is enough for two to share as a tapa
Olive Oil - approx 2-3 tbsp
Sea Salt - Maldon would be perfect here.

2 Servings: 128 calories, 14g fat, 2g sat fat
  1. Heat a frying pan until it is very hot, a couple of minutes should do it. 
  2. Pour in a generous glug of olive oil, you want the base of the pan to have a covering of about 2-3mm depth. 
  3. Put the peppers in the pan keeping the heat high. Move them around a bit so they cook evenly. You are aiming for the peppers to blister and colour up. This will take about 2-3 minutes. 
  4. Take the peppers off the heat and pour into a serving dish. Sprinkle them generously with the sea salt and serve. If you're not concerned about calories it is nice to dip your bread in the oil left behind in the serving dish.


Grilled Courgette & Aubergine
Another super easy recipe but full of great flavours. You can eat this warm or prepare it in advance and chill it for eating later. You can cut the courgette and aubergine any way you like but it is easier to serve and eat if you try and keep them similar.

Ingredients
1 courgettes, sliced lengthways 5mm thick - approx. 220g
1 aubergines, sliced lengthways 5mm thick - approx. 500g 
Olive Oil - 2 tbsp
Juice and zest from 1 lemon
Black Pepper
Salt
Fresh rosemary, chopped - 1 sprig
Fresh oregano, chopped - 1 sprig
clove of garlic, crushed
Oil Spray
For a variation try adding a sprinkle of dried chilli flakes and/or a teaspoon of fennel seeds.
  1. Heat up your griddle pan, it needs to be very hot - do not add any fat to the pan, it will smoke and burn needlessly.
  2. Mix together the olive oil, herbs, salt, pepper, lemon juice and zest and garlic (and the chilli flakes and/or fennel seeds if you're using them) and leave to one side. 
  3. Once the pan has heated up, lightly spray the veg slices and place the pan in a single layer and cooked for a couple of minutes on each side. Don't move them around otherwise you won't get the grill marks. 
  4. When the slices lift up easily from the pan and have got a decent colour on them turn them over. Depending on the size of your grill pan you might need to do this in batches. Once each batch is cooked, remove them from the pan and place in your serving dish.
  5. Once all the courgette and aubergine is cooked pour the oil, lemon juice and herb mix over them slices and then leave for at least 10 minutes for the flavours to mix. 


follow me

Follow Us