I love pierogi. Not a particularly shocking statement from a woman with a fiercely patriotic Polish grandmother, but true nonetheless. For me the best pierogi have to be the classic 'ruskie' version filled with mashed potato, golden fried onions and cheese. Other pierogi such as sauerkraut and mushroom or meat fillings are perfectly lovely but nothing beats a well made pierogi ruskie gently cooked in butter or lard until it is golden and crispy on the outside and topped with a generous scattering of crispy onions in butter or small pieces of crispy bacon. This is definitely not health food but it's sometimes the only thing that will make you feel better about life or help to cure your homesickness. As children we'd normally have them for dinner with some baked beans or a big splodge of tomato ketchup - I guess this is a symptom of being raised in an anglo-polish family. It's not so easy to get hold of the right cheese, twarog or farmers cheese, for pierogi ruskie in Bangkok so I decided to make my own rather than substitute. It's very easy to get twarog back in the UK now, just take a look in the chilled cabinet in any big supermarket and it'll be alongside all the other 'ethnic' goods along with some half decent kielbasa. It's not at all difficult to make twarog though so why not give it a go if you have the time. For my home made twarog I follow the method described perfectly by the ever creative Chip Butties and Noodle Soup.
The Dough (This recipe is based on Beata Zatorska's which can be found here.)
To make the pastry for about 120 pierogi
1kg plain flour
125g unsalted butter at room temperature
500ml warm water
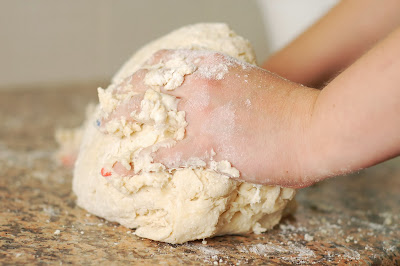
- Put the flour on to a big open work surface and rub in the butter then mix in the water little by little until you have a soft, pliable dough.
- Place in a bowl and cover over to avoid it drying out while you prepare the filling.
Pierogi Ruskie Filling
1kg approx cooked mashed potato
500g twarog (Polish Farmer's Cheese)
1 large onion, finely diced
2 tbsp of butter
salt and pepper to taste
- Cook the onion with the butter until soft and golden brown.
- Mix the mashed potato, onion, cheese, salt and pepper together until thoroughly combined.
Putting it all together
- Roll out a piece of the dough on a floured surface to about 3mm thick then using a cutter or up-turned glass cut out circles of about 8cm diameter.
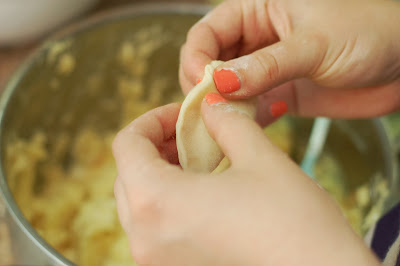
- Fill each disc with a teaspoon of the potato and cheese mixture then fold the disc over and crimp the edges together with your thumb and forefinger.
- Once you've made a few you can either cook them immediately in boiling salted water. This should only take a few minutes, they're done when they float back up to the surface. Alternatively you can freeze them then cook when you want them. If you choose to freeze them, put them in the freezer in a single layer on baking parchment. Once they're frozen put them in a zip lock bag for easier storage. You can cook them directly from the freezer.
- One of my favourite ways to serve pierogi is to fry them in a little butter after they've been boiled. Cook them until they're crispy and top with crispy cooked onions or bacon bits.
NOTE: I recently tried a different cooking method for preparing the pierogi from frozen, similar to that used when you cook frozen gyoza. I heat a little oil in a non-stick pan and put a single layer of pierogi in the pan then cook them for 2-3 minutes or until they just begin to colour. Next add recently boiled water from the kettle so that the pierogi are 2/3 covered in water. Cover the pan and cook on a medium heat for 10 minutes. If at the end of this time the water hasn't completely evapourated remove the lid and allow to cook until the water has completely disappeared and the pierogi have crispy bottoms.
I've added these awesome pierogi to Made with Love Mondays over at Javelin Warrior's site.
Four Seasons Food hosted by Delicieux and Eat Your Veg


