Showing posts with label chocolate. Show all posts

Wednesday, 4 September 2013

chocolate banana bread


Before I arrived in Thailand I was often thinking about what food I might miss from home with cheese, proper fish and chips and good quality baked goods always pretty high on my list. What I wasn’t prepared for was the abundance of excellent and delicious baked cakes, breads and pastries that seem to be available everywhere. This sweet, enriched bread recipe is inspired by Thai flavours and ingredients and happens to be almost entirely vegan if you used a vegan chocolate. It is essentially an enriched dough with the egg replaced by banana and the coconut oil and milk replacing dairy butter and milk. This chocolate banana bread makes a delicious treat breakfast or is good with a cup of tea of coffee any time of day.


Ingredients
2 medium bananas (approx. 1 cups mashed banana)
200ml coconut milk
55ml coconut oil
380g/3 cups bread flour
2 tsp fast action yeast
200g dark chocolate cut into rough chunks
generous pinch of salt
50g palm sugar (or brown sugar)

  1. Mash together the bananas and stir in the coconut oil then place into a large mixing bowl along with all the other ingredients apart from the chocolate and bring together into a rough dough. 
  2. Turn out onto an oiled surface and kneed for a few minutes then place into an oiled bowl, cover with plastic wrap then leave in a warm place to rise for around 2 hours. You may need to adjust the flour or moisture level at this stage but do this with care adding a spoon of flour or water as needed. 
  3. After the first rise add in the chocolate chunks and gently fold the dough over them creating before turning out on to a baking tray lined with parchment or a loaf tin. I quite like the free form style with this bread but feel free to shape as you wish. Sometimes I mix the chocolate chunks through the dough making sure it is evenly spread or, as I have done in this version I have kept most of the chocolate contained in the centre of the dough so you have yummy almost solid chocolate centre to bite into. I was going for the kind of bite you get with a good pain au chocolat. 
  4. Cover with plastic wrap and leave for another hour or so until it has risen to almost double the original size. 
  5. Pre-heat the oven to 230C then place a roasting pan filled with some water in the bottom of the oven to create some steam during the baking process. 
  6. Place the bread in the oven, reduce the heat down to 200C and bake for about 30-40 minutes or until you have a golden crust. 


Thursday, 11 July 2013

'grown-up' chocolate cakes


I'm still in the process of going through my pantry and using up as much of the stuff I've got in the house as I can before I move. I had lots of chocolate around, the usual cakey ingredients as well as a bottle of whiskey I was never going to get around to drinking. Using my Dr Pepper cupcakes recipe as the starting point I came up with this rather grown up recipe. The whiskey flavour isn't particularly strong but it does add some complexity to the end product. You could replace the chocolate spread with the equivalent amount of melted chocolate or a dark jam such as cherry or blackcurrant, why not try out whatever you've got to hand.

Ingredients
100g unsalted butter
300ml whiskey
100g plain flour
50g cocoa powder
2 tbsp chocolate spread such as nutella
1 tsp baking powder
1 tsp vanilla extract
150g demerara sugar
12 dark chocolate lindor truffle balls or similar.
2 eggs

Ganache Topping
100g dark chocolate
100g butter
pinch of salt

Makes 12 cupcakes.
  1. Start by add the sugar to the whiskey then heating the mixture of a medium heat until the sugar is dissolved, the alcohol has evaporated off and the mixture has reduced by about two thirds (around 200mls or so).
  2. Preheat the oven to 180C fan oven. Put the paper cases in the muffin tray and fill a large oven proof dish with water and place in the bottom of the oven. The steam that is produced will help the cakes to rise and be lovely and light.
  3. Put the butter and chocolate spread in the saucepan and allow it to melt in the residual heat. Stir through and add the vanilla extract.
  4. Sieve together the dry ingredients to get rid of any lumps, then beat in the whiskey mixture followed by the eggs until thoroughly combined. 
  5. Put a dollop of the mixture into each of the paper cases (about 1/4 cup if you have a measure). Place a chocolate ball in the centre of each case then put in the oven. Bake for around 20 minutes or until a skewer comes out clean.
  6. Allow to cool completely before decorating with frosting or ganache.
Making the ganache
  1. Melt the butter and chocolate together in a heatproof bowl over gently simmering water. You can use it now as it is to give a thin covering to the cupcakes but I prefer to allow it to set in the fridge, returning to beat it every 10 minutes or so until it is a spreadable consistency. Once you've achieved this consistency you're ready to go.


Sunday, 26 May 2013

super awesome cookies

Sometimes only a cookie will do and these chocolate, caramel and cornflake cookies make for a 'super awesome' treat.


Ingredients Makes about 22-24 cookies
225g unsalted butter at room temperature
200g granulated sugar
200g light brown sugar
40g ovaltine or other malted milk powder
1 egg
½ tsp vanilla extract
225g bread flour
½ tsp baking powder
¼ tsp bicarbonate soda
1 tsp salt
100g dark chocolate chunks (I use a bar of dark chocolate and roughly chop it with a knife but use pre-formed chips if you like)
60g cornflakes
135g chocolate covered caramel (I used a smashed up galaxy caramel bar)
  1. Cream the butter and sugars together using an electric mixer for around 2-3 minutes. The mixture will look like creamy coffee. 
  2. Next add the egg and vanilla and beat for a further 5 minutes. It will become much lighter in colour and have a fluffy texture. 
  3. Add the flour, baking powder, bicarbonate soda and salt and using a wooden spoon or spatula mix the dough until it comes together. 
  4. Add the chocolate chunks and cornflakes and stir until just mixed. Try not to break the pieces up too much. 
  5. Line a baking tray with baking parchment and place tablespoon sized portions of the mixture on to the tray. Cover the tray with cling film and place in the fridge for at least an hour. 
  6. When ready, preheat the oven to 180C then space the cookies out on baking parchment so that they are at least 16cm apart (they will spread out a lot). Then bake for around 15 minutes or until slightly browned on the edges but still mostly unchanged in the centre. 
  7. Allow the cookies to cool completely on the tray before you remove them to an airtight tray for storing. They will last for about a week at room temperature or can be frozen for up to a month.


Tuesday, 2 April 2013

thai feasting - part 1 bangkok

I was lucky enough to be able to spend a couple of weeks over Christmas and New Year in Thailand. It was the perfect way to escape the usual pressures and expectations of this time of year and to get some sunshine too. It has taken me a while to get round to posting about my adventures and I will explain why soon. I've recently been checking out this website called Import Food. It's got lots of great videos and excellent recipes too. Well worth an explore if you're interested in learning more. Enjoy!

Whenever I go somewhere on holiday I always try to seek out new tastes and ingredients in an attempt to better understand the flavours that make up country's food. In a short trip I was never going to completely get to grips with all of Thai food. Instead I decided to set myself the challenge of seeking out the best pad thai I could find and to indulge in the kinds of street foods that I can't get back in London.


Pad thai quest part 1
Pad thai is the national street food dish of Thailand. On most street corners you can find a cart dishing it out. Like most national dishes, everyone has their own way of putting it together but this video recipe from SITCA is a great place to start. This recipe also seems to come close to the dishes we ate. We started our search at Thip Samai because it is recommended in numerous food and travel blogs as serving 'the best' so we had to give it a go. This was going to be the pad thai by which all others were going to be measured so it made sense to start at the top. Thip Samai serves numerous variations on the standard dish but we went for the 'superb pad thai'.


Once you've place your order you're brought a selection of accompaniments. We got banana flower, bean sprouts, spring onions and lime segments. On the table were already pots of crushed peanuts, chilli sauces and chilli flakes.


Here's the pad thai when it arrived. I loaded mine with extra peanuts and chili flakes because I'm a bit of a chili fiend given half the chance. I was particularly taken with the presentation of the dish with the noodles carefully wrapped in a fine omelette. 


Now, perhaps unsurprisingly I'm a bit of a greedy person so a little later I was after something else to eat. Close to our hotel in Bangkok was a busy little market stretching the length of the street with numerous tasty treats on offer. If in doubt in a new country I'll go for something I've never had before and I couldn't resist finding out what 'coconut egg' was. During the rest of our time in Thailand I never found another stall serving these curious little things but it's definitely something I want again. They were crunchy, crispy gooey, sweet but a little savoury all at once. A very special little thing. I've done a some internet research since returning and I think it was Khanom Buang. Check out this page for more info. This is a neat video showing how another lady makes them.


Our next culinary stop was at one of the ubiquitous roti pancake carts in the same market. Normally when making crepes and pancakes you start with a batter and pour it out on to a hot griddle. Not with these glorious beauties. The stall holder started out with a little ball of dough and deftly pulled it out so that it was transparent and paper thin before putting on the griddle. Here's a lovely video of a stall holder in action. The skill of the food stall holders in Thailand is incredible. The speed and skill they repeatedly demonstrate is awe inspiring.  I couldn't resist the classic banana and nutella combo topped off with a drizzle of condensed milk. Yum!


Sunday, 13 January 2013

pistachio cookies three ways


Living where I do in London there are numerous small shops selling beautiful looking and delicious tasting baklava. This has undoubtedly been the influence behind my latest recipe offering. The flavours of pistachio, cardamon and honey are a perfect combination and come together in a fragrant, elegant and crisp biscuit. The dough is fairly forgiving and you can shape it however you like.You should also feel free to experiment with the fillings or leave them unfilled so that you can dunk them in your tea. It will be a great biscuit however you decide to make them. Below I've included recipes for both a honey and orange buttercream and a chocolate ganache filling.


Biscuit Ingredients
375g plain flour
250g caster sugar
125g unsalted butter at room temperature
100g shelled pistachio nuts (set a few to the side if you want to use them for decoration)
1/2 tsp ground cardamom
1 medium egg
Generous pinch of salt
  1. Put the pistachios and sugar in the food processor and pulse until finely ground and resembling fine breadcrumbs. 
  2. In a bowl beat the butter with an electric whisk until soft then add the egg and beat for a further 30 seconds or so.
  3. Add in the remaining ingredients and mix until you have a dough. You may find it easier to do this with your hands. 
  4. Form the dough into a 40cm log and wrap in cling film. Leave to rest in the fridge for around an hour. 
  5. When ready to bake, preheat the oven to 170C and line a baking sheet with baking parchment. 
  6. Unwrap the dough and cut off discs about 1/2cm thick. You can alternatively roll the dough out on to a lightly floured surface Place on the baking sheet, place a halved pistachio in the centre of biscuit if you wish and then bake for around 15 minutes or until just golden on the edges. 
  7. Once cooked allow to firm up on the baking sheet before removing them to cool completely on a wire rack. When the biscuits are completely cool you can fill them with one of the options below or eat them as they are. Enjoy. 


Honey and Orange Buttercream
100g butter at room temperature
400g icing sugar
3-4 tbsp honey
finely grated zest of half an orange
couple of tablespoons of cream or milk
  1.  Using an electric whisk, beat the butter until it is light and fluffy then bit by bit sift in the icing sugar. 
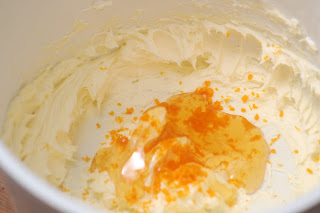
  2. Once the sugar and butter are thoroughly combined add the honey and zest and beat for a few seconds. If the icing is a bit thick add a couple of tablespoons of milk and cream and beat in until you have a smooth consistency.


Chocolate Ganache
100g dark chocolate broken into small pieces
100ml double cream
pinch of salt (optional)
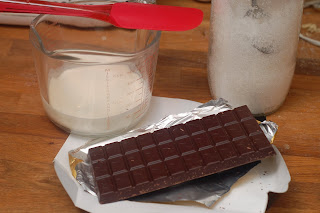
  1. Heat the cream in a saucepan over a low heat. Remove from the heat just before it reaches boiling point then pour over the chocolate pieces in a heatproof bowl.
  2. Stir the chocolate and cream together until the chocolate is completely melted. Add the salt is wanted then set the mixture to one side to cool. 
  3. Once the mixture has cooled down, beat it with an electric whisk until it thickens up. 


follow me

Follow Us